Why Shooting Alongside Other Photographers Helps
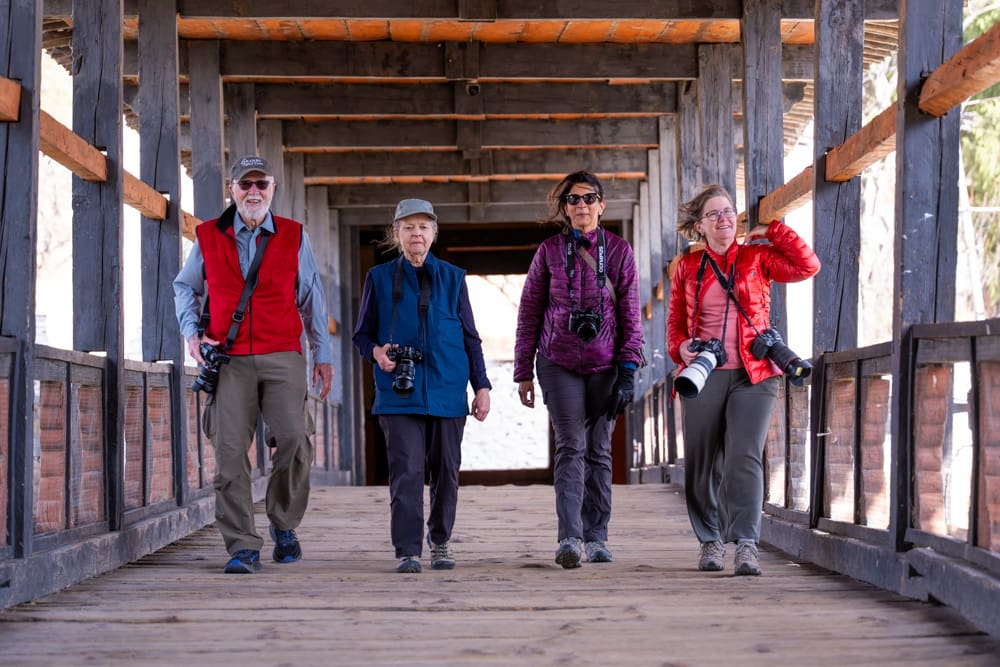
We had a great gang of folks with us to explore, experience and photograph both Sydney and the surrounding areas of the Central Coast and the Blue Mountains. As photographers, we all know that adding people to your travel group can sometimes stifle the photography. With dedicated photo tours, there tends to be a net advantage to traveling with other photographers.
One of the most important lessons in all of photography is personally witnessing the conditions of a situation and the photographic results. I’m sure we’ve all been in a situation where we wanted to take a good photograph but were stymied by some challenge. We wondered how anyone might find a good shot under those particular conditions.
When you work in the field with a number of other photographers, you will routinely see them photographing away, and it might not be clear to you what their subject and composition might be. With the image reviews that we hold on each of our tours, there tend to be a lot of “aha” moments.
When you find yourself in an uninspiring situation, but another photographer finds a way to make a great photograph, you quickly learn that there are great photos all around. We just need to have an educated and open mind to the possibilities.
Image Reviews
At least twice on each tour, we hold image reviews where everyone selects a few images to share with the group. The goal is to share your vision and results. As tour leaders, we look at both technical details and artistic choices. With each photo, there ends up being a group discussion about the various attributes and the options for how it could have been improved, if at all.
The images in this article were all taken by attendees of the Mountains to Sea: Australia Photo Tour 2026. Please note that attendees on our tours have a variety of photographic experience. Some photographers have decades of experience, and some folks have just picked up the camera in the last year or two, with this tour being their most significant photographic experience to date. Some photos were submitted to the reviews during the tour, some later, but all were allowed to be republished here, along with the critical review.
Barry Johnson, USA
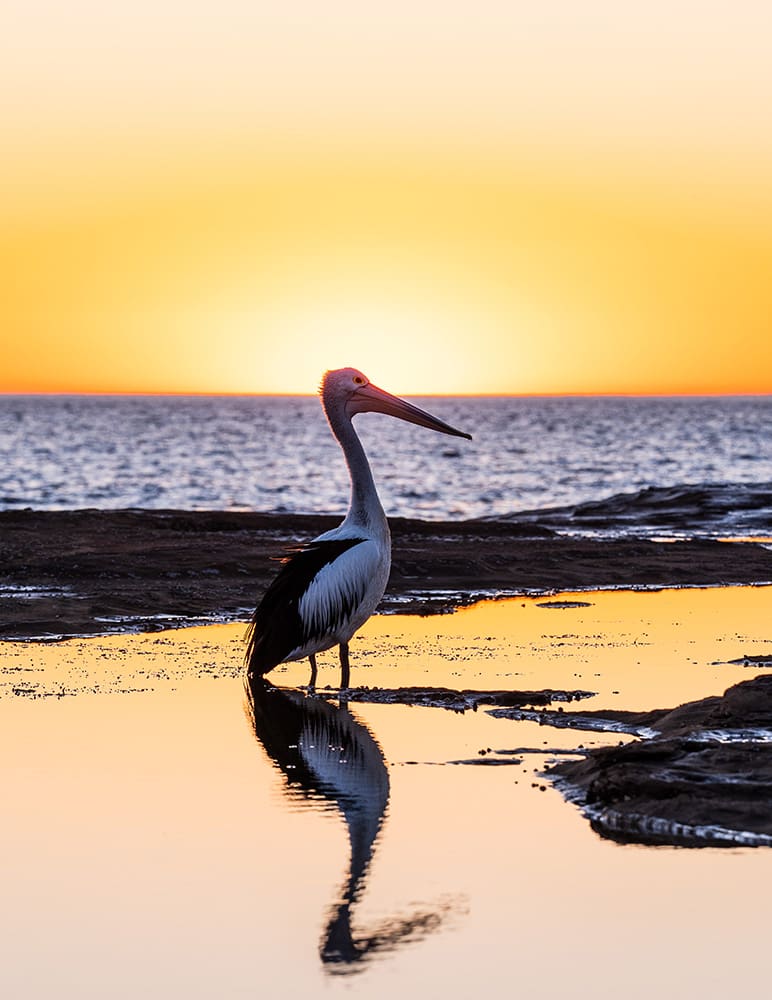
sony A9 III, Sigma 70-200mm F/2.8 DG DN OS @ 144MM | 1/200 SEC | F/7.1 | ISO 250
Pelican at the central coast
[Photo by Barry Johnson]
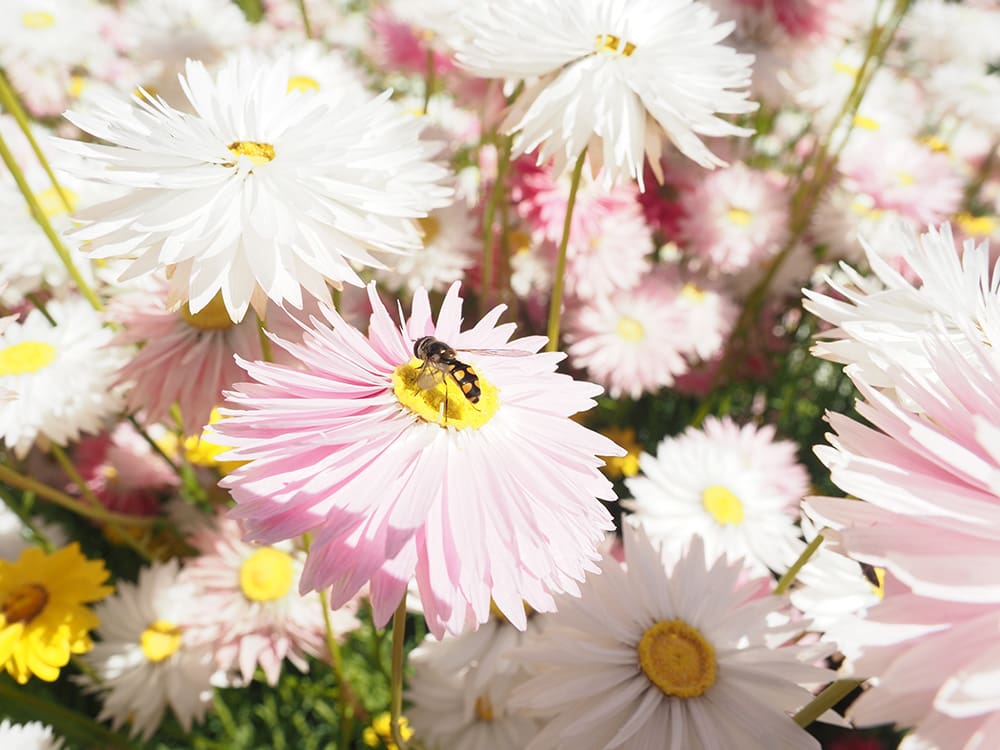
Olympus E-M1 Mark II, M. Zuiko 12-40mm F/2.8 Pro @ 12MM | 1/400 SEC | F/8 | ISO 200
a bee amongst A sea of paper daisies
[Photo by Aki Ghani]
I know that the size of the photos in this article is limited. So let me assure any of the skeptical folks out there: the bee is in absolutely tack-sharp focus. With that out of the way, we can clearly say this is a beautiful image. The field of flowers might be a lovely shot on its own, but with the added element of the bee, it turns a home run into a grand slam.
This is a good example of a high-key image, one that is very bright in exposure. This is also a great example of why you shouldn’t blindly follow your exposure meter. If the camera’s exposure system were in full control, it would want to make this image about 1.5 stops darker. While I like the overall brightness, it might be worth dialing back the highlights and whites just a tad. It may bring in even more color.
I like the composition with the bee a bit off-center. However, I don’t like the strip of green in the lower-left corner. I’ve tried cropping it out, and it ends up pushing the bee toward the middle of the frame, which doesn’t work as well. If I saw this out in the field while shooting, I would continue shooting from a slightly different point of view that would minimize the green grass but maintain the flower pattern throughout the frame with the bee in the lower-left corner.
Close-up shots with a wide lens (24mm full-frame equivalent) are difficult to pull off; this is a good example of why you shouldn’t completely write them off.
Chris Johns, Australia
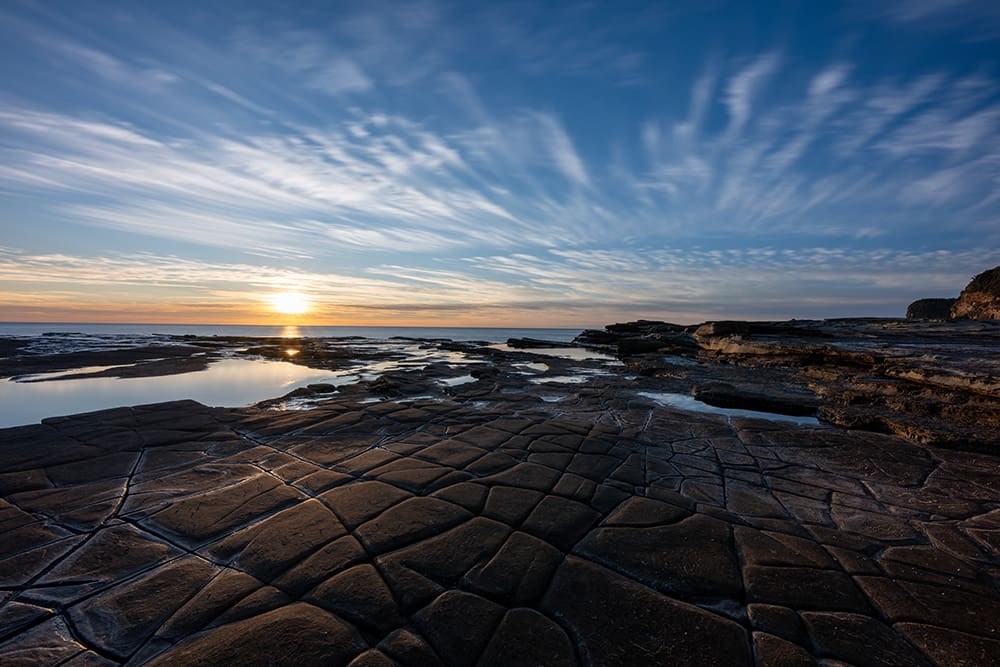
Nikon Z8 Z 14-24mm F/2.8 S @ 14MM | 1/15 SEC | F/11 | ISO 64
sunrise at the Central coast of New South Wales
[Photo by Chris Johns]
Great photos are likely when preparation meets fortune. Sunrise shoots start early in Australia, and it’s photos like this that we are hoping for when we wake up at 4:30 a.m.
In the world of landscape composition, we often talk about placing the horizon either high or low in the frame. This photo features a horizon line right across the middle, but in this case there is good reason for it: we have both an interesting foreground and sky.
With an engaging cross section of tessellated rocks in the foreground, we have a solid graphic element. In the skies, we have an unusual and short-lived pattern of clouds that provides numerous angled lines that bring the eyes from the top of the frame to the middle. As for the exposure, I might try to brighten the shadows a bit more to make those tessellated rocks easier to see.
I’m not sure about the rising land on the right-hand side; some might see it as a bit distracting. I’d like to see another version pointing just a little to the left, cropping it out. You can also apply a slight crop to this image to fix it.
Having seen this image, which is very good, I’d also try to lower the camera to enlarge those grooves in the rocks. I might try moving a little to the left and forward so that the noticeable “X” in the sunshine would be more dominant in the frame—that could be a very strong foreground element.
Matt McWright, USA
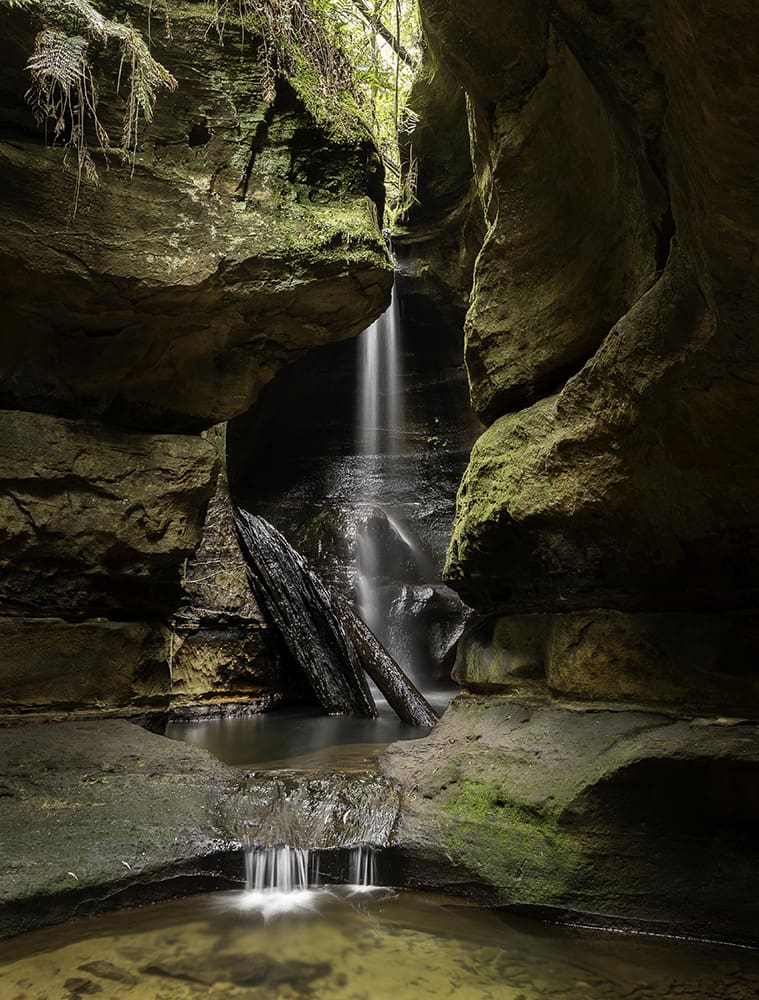
Sony A7 IV | FE 16-35mm F/2.8 @ 16MM | 0.6 SEC | F/8 | ISO 100
Blue Mountains water hole
[Photo by Matt McWright]
This was not an easy photo to get—trust me, I was there. A narrow, tricky ledge with a low-hanging ceiling didn’t allow for much movement. This is a very nice capture in both exposure and perspective. A tripod and slower shutter speed (0.6 seconds) was the right choice and well worth the hassle it was to bring along.
The top of the frame is a little distracting in brightness and with the bits of hanging vegetation. I’d experiment with bringing the crop down, eliminating that wedge of highlights at the top of the frame. Reframing it on scene, I’d try tilting the camera downward and including more of the pool at the bottom.
Nedra Murray, USA
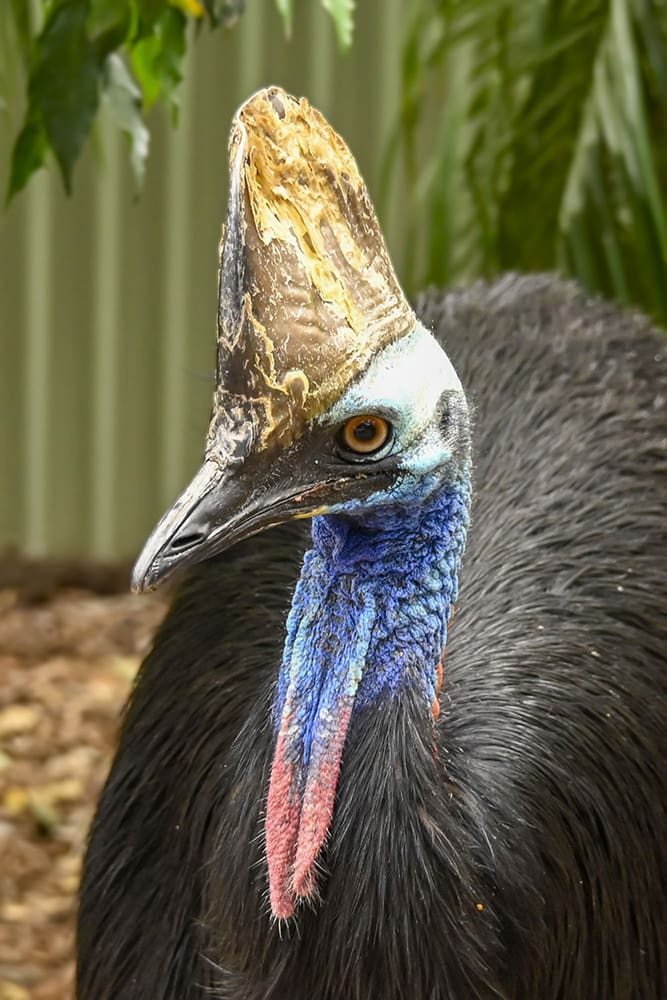
Nikon Z5, Z 28-400mm F/4-8 @ 400MM
Southern Cassowary
[Photo by Nedra Murray]
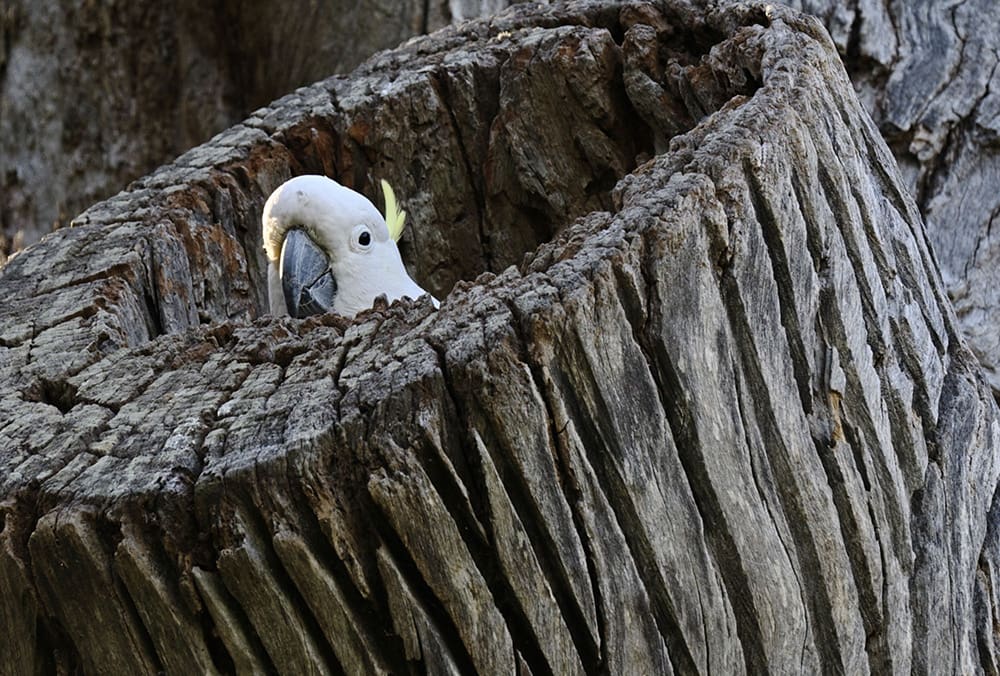
Nikon Z 6II, Z 100-400mm F/4.5-5.6 @ 340MM | 1/100 SEC | F/10 | ISO 400
Sulphur Crested Cockatoo
[Photo by Tim Murray]
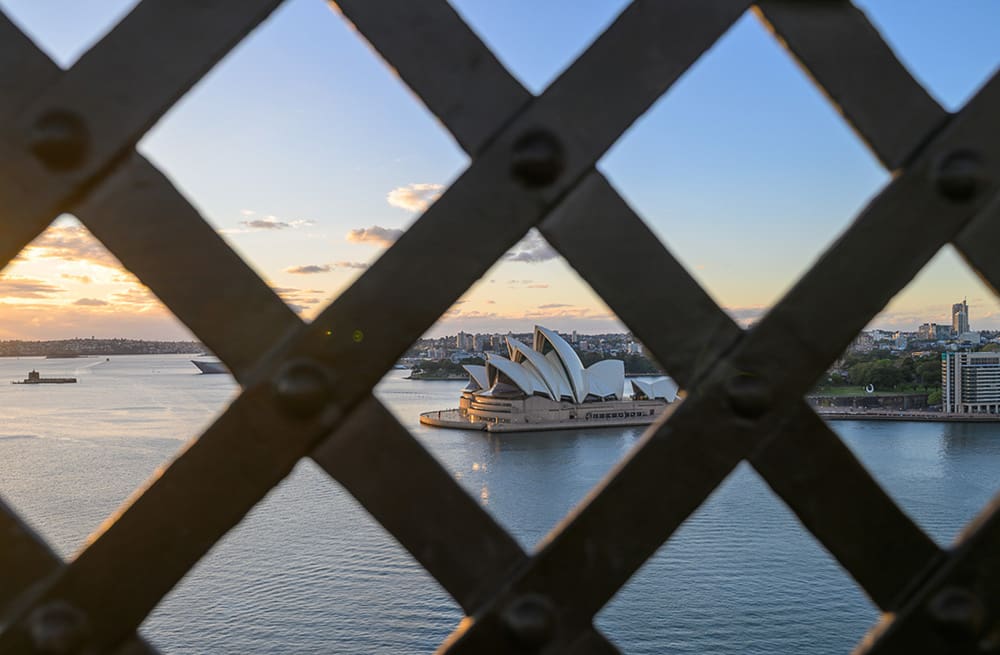
Nikon Z 8, Z 17-28mm F/2.8 @ 28MM | 1/100 SEC | F/5.0 | ISO 100
Sydney Opera House
[Photo by Travis Spencer]
Just when you think you’ve seen every imaginable shot of the Sydney Opera House, it feels so good to see a new take on it. I congratulate Travis on thinking differently. I’ve been up on the Sydney Harbour Bridge a number of times but have never seen this shot, possibly because you need to be about 2 feet off the ground to capture it.
While I think the center composition works well, I’d be curious to see other variations with the key subject a little out of the center. If you could fill one or more of the other openings with a ferry boat, bird or sun, that might really take this image to the next level.
Become part of John’s inner circle
Sign up for the newsletter here — it’s free.
Want to become a better photographer?
Check out John’s selection of photography and camera classes here.