Every new camera seems to offer something that’s never been done before. Having looked very closely at almost every new camera for the last 30 years I’ve developed a pretty quick take on whether it’s a feature that I find useful or not.
As I’ve been working with a number of new cameras over the last year I thought I’d make a list of what I think are the best of the new features. As I’ve been in this game for a while my definition of new is very loose. Some of these will be newer than others but all are ones I’ve come to appreciate. If you’re not sure if your camera offers these, perhaps this will inspire you to take a closer look. You can peruse your camera’s menu or manual, or review one of my camera classes because these are features worth talking about.
Time-Lapse
I love a good time-lapse. The ability to compress time allows us humans to appreciate things that are difficult for us to see with our own eyes. It’s kind of like photography in reverse. Still shots allow us to stop time so that we can see fast moving subjects. Time-lapse allows us to see slow moving subjects in a new way that helps us understand them.
Shooting hundreds if not thousands of images that get compressed into a video file wasn’t always so easy. Back in the old days of film, time-lapse was the domain of the cinematographer and out of reach for the average still photographer. Digital came around and it was as simple as hooking up a special cable release, at least in the case of my old Canon 5D. Now days, most cameras have a time-lapse feature built right in.
From clouds rolling over the mountains to concert stages being erected, there is no end to subject material. When shooting a time-lapse, the best subjects are often ones that change very slowly. My favorite settings are shooting 300 images often around 10 seconds apart. This will result in 10 seconds of video when shooting at 30fps. But settings are determined by your subject’s motion and your desired outcome. Assembling the time-lapse is usually done in software on your computer afterward, but many cameras now offer the ability to offer a finished file directly in the camera.
Time-lapse from Varanasi’s crowded streets
Buffer Shooting
Ok, I’m making this name up, because it’s so new that only a couple of companies are doing it, and an industry standard name has not yet emerged. Both Olympus (Pro Capture) and Fujifilm (Pre-shot ES) offer cameras with the ability to record images before you press the shutter release fully.
This is not the standard form of operation but a special mode that you must enter into, often with several restrictions. The reason for this mode is to capture action that is unpredictable. Think of whales breaching, geysers erupting and archers releasing an arrow.
Some time ago, using a reasonably fast motor drive and a bit of guessing I tried capturing archers in Mongolia with the goal of capturing the arrow in flight just as the bow is released. It took me about a hundred tries and a thousand images to get a few winners. The next year in Bhutan, with this new feature engaged, I was able to get my desired shot every time the archer fired an arrow. It felt like I was cheating, but I loved it.
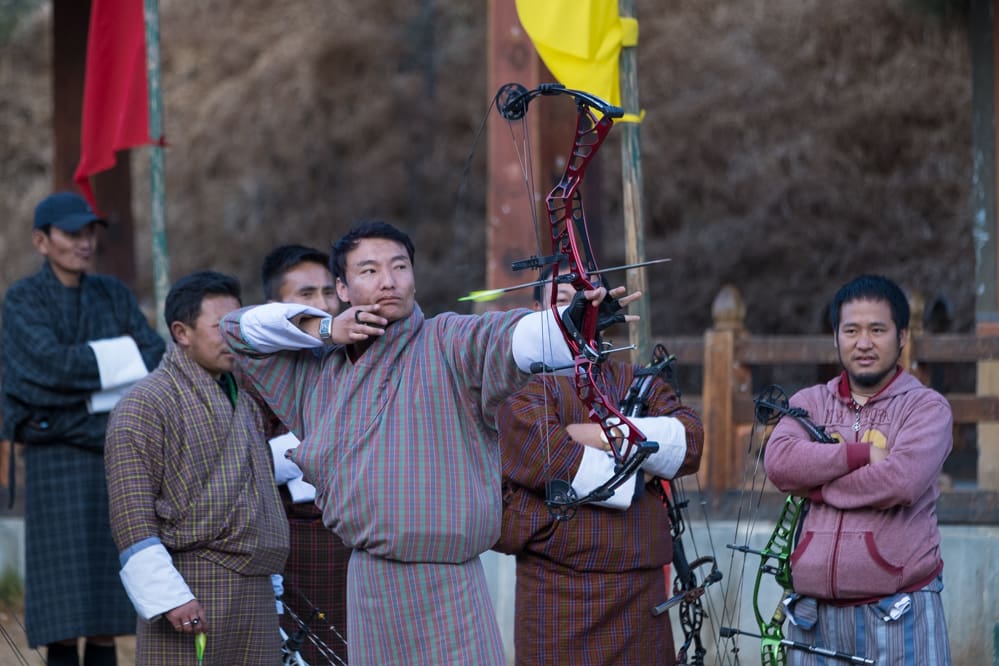
Fujifilm X-T3 ~ XF 50-140mm f/2.8 R LM OIS WR
ISO 800 ~ f/2.8 ~ 1/1000 sec. ~ 140mm
Face Detection
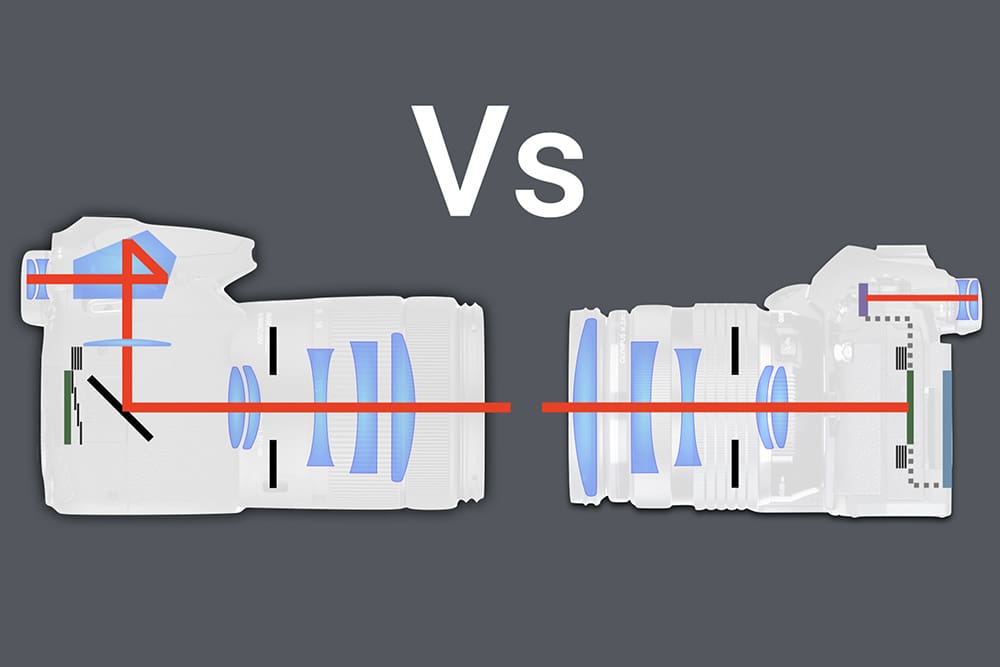
A benefit we all get from the current wave of mirrorless cameras is the advancement of the focusing systems. The ability to track faces wasn’t possible before because the AF sensor wasn’t sophisticated enough. With a 20 to 60 megapixel sensor that doubles as the focus sensor we have much greater capabilities today.
Most all mirrorless cameras now offer the ability to track faces, specifically eyes and even animal faces. A number of DSLR’s also offer a limited version of this when shooting in Live View.
This solves the problem of portrait photography where you may want a very shallow depth of field, but the in-focus point must be spot on for the photo to succeed. Standard practice for years was the focus with a single point, then recompose with the camera for a pleasing composition. This technique can still work well, but is limited to static subjects. The process will fail if you, or your subject, should slightly lean forward or backward.
Correct focus is now simplified by entering the face-tracking mode, in some cases choosing which eye you’d like to focus on (left or right), and the camera will follow your subject around the frame. This will work for still or moving subjects. All the mirrorless options are doing quite well with this feature and the top performing brand seems to change hands with every new camera.
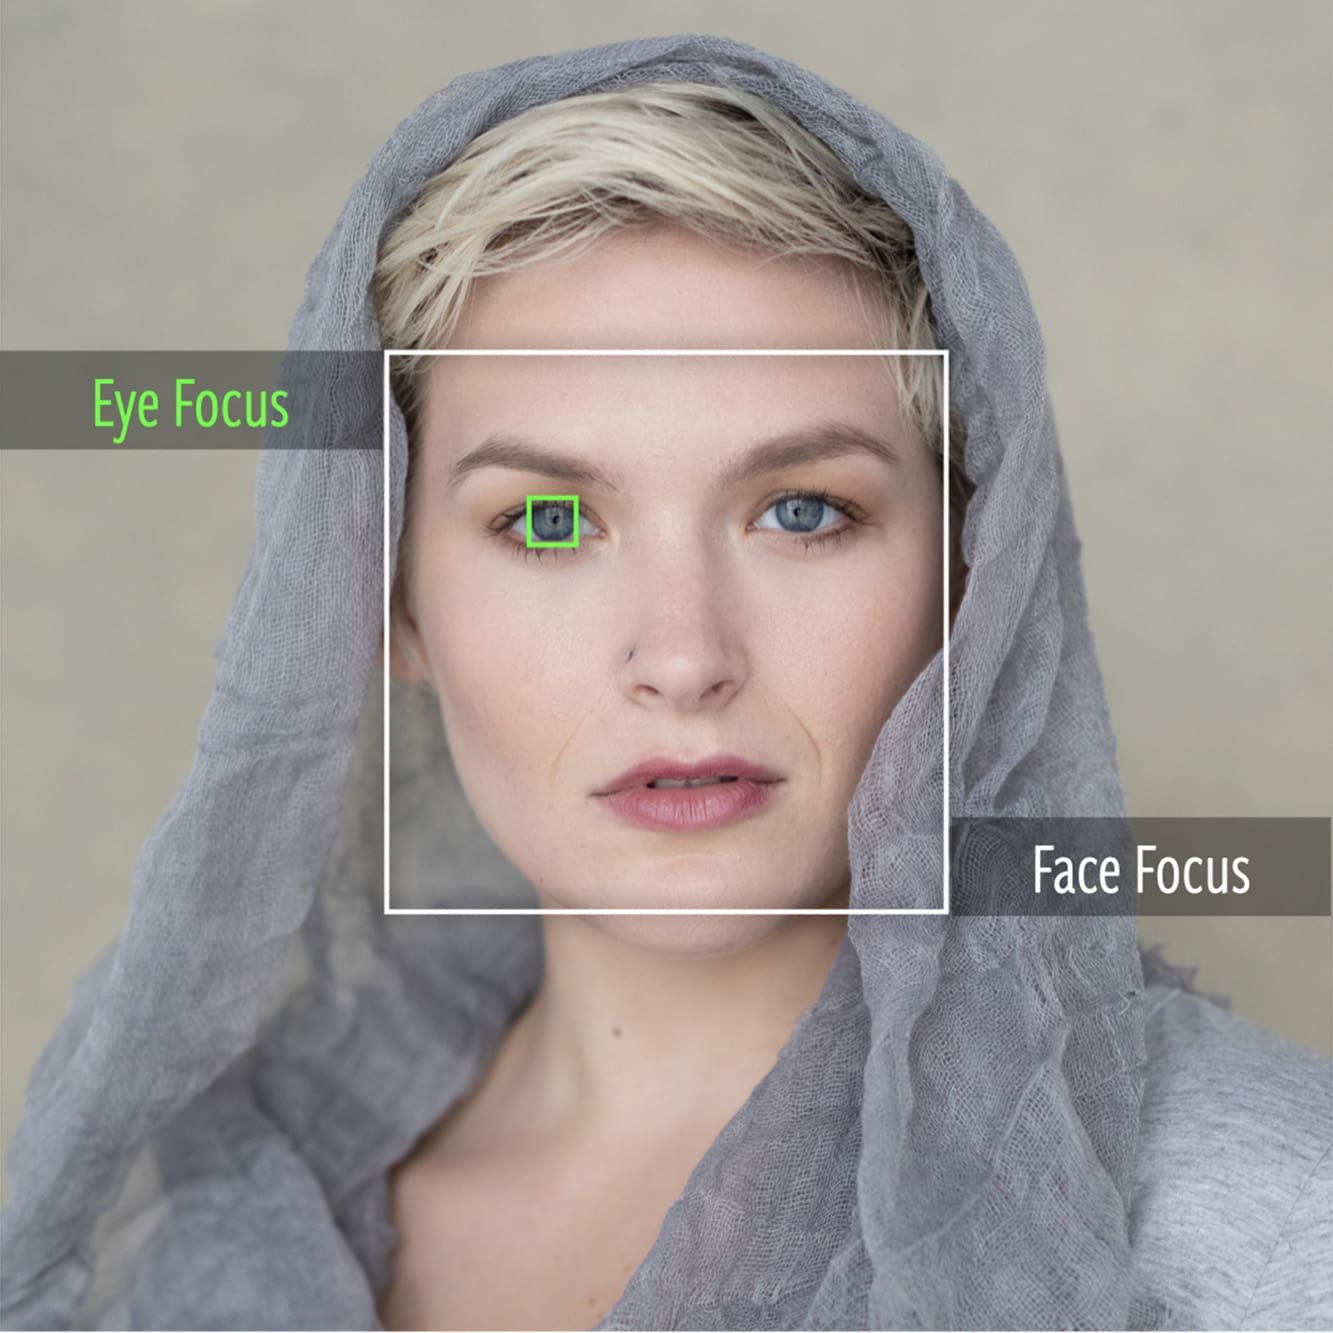
Cameras with face and eye tracking will show you on-screen exactly where the focus will take place

Canon EOS 5D mark IV ~ EF 70-200mm f/4 L IS USM
ISO 800 ~ f/4 ~ 1/250 sec. ~ 127mm
Focus Bracketing
With higher and higher megapixel cameras, there comes an increasing demand for image sharpness. For images where great depth of field is desired, it used to be that you’d stop down to f/22, diffraction be damned, and hope for the best. Now with Focus Bracketing you can easily take several shots at a much more modest aperture and blend the collection of images together (in post, using a Focus Stacking program) for an image that is both sharp and offers great depth of field.
Subjects for this technique are limited to those that are non-moving, so macro, architecture, and product photography have the most to gain. I usually use an aperture of f/8 to f/11 so that I can achieve maximum sharpness and a bit of depth of field. I’ll need to determine how much I want in focus and that will lead me to experiment with the number of shots and their focus increment. The idea is to shoot a minimum number of images where the depth of field in each image overlaps with the previous image. All the images are then run through an image stacking program where the sharpest area of each image becomes part of the final image. Determining the correct number of shots, increment (distance between one shot and the next) and the aperture all require a bit of testing and experimentation.
I usually don’t use this feature in the field because it doesn’t work well with traditional landscape photographs where trees, bushes and grasses can be blowing in the wind. It’s most useful to me in the studio where I’m shooting product images. I’ve found that this is the only way in which I can get truly tack sharp focus from near to far on an object. While there are several image stacking programs for compiling the final image, I use Helicon Focus. It’s a great program, but I look forward to the hopeful day that Lightroom adds it to the list of built-in features.
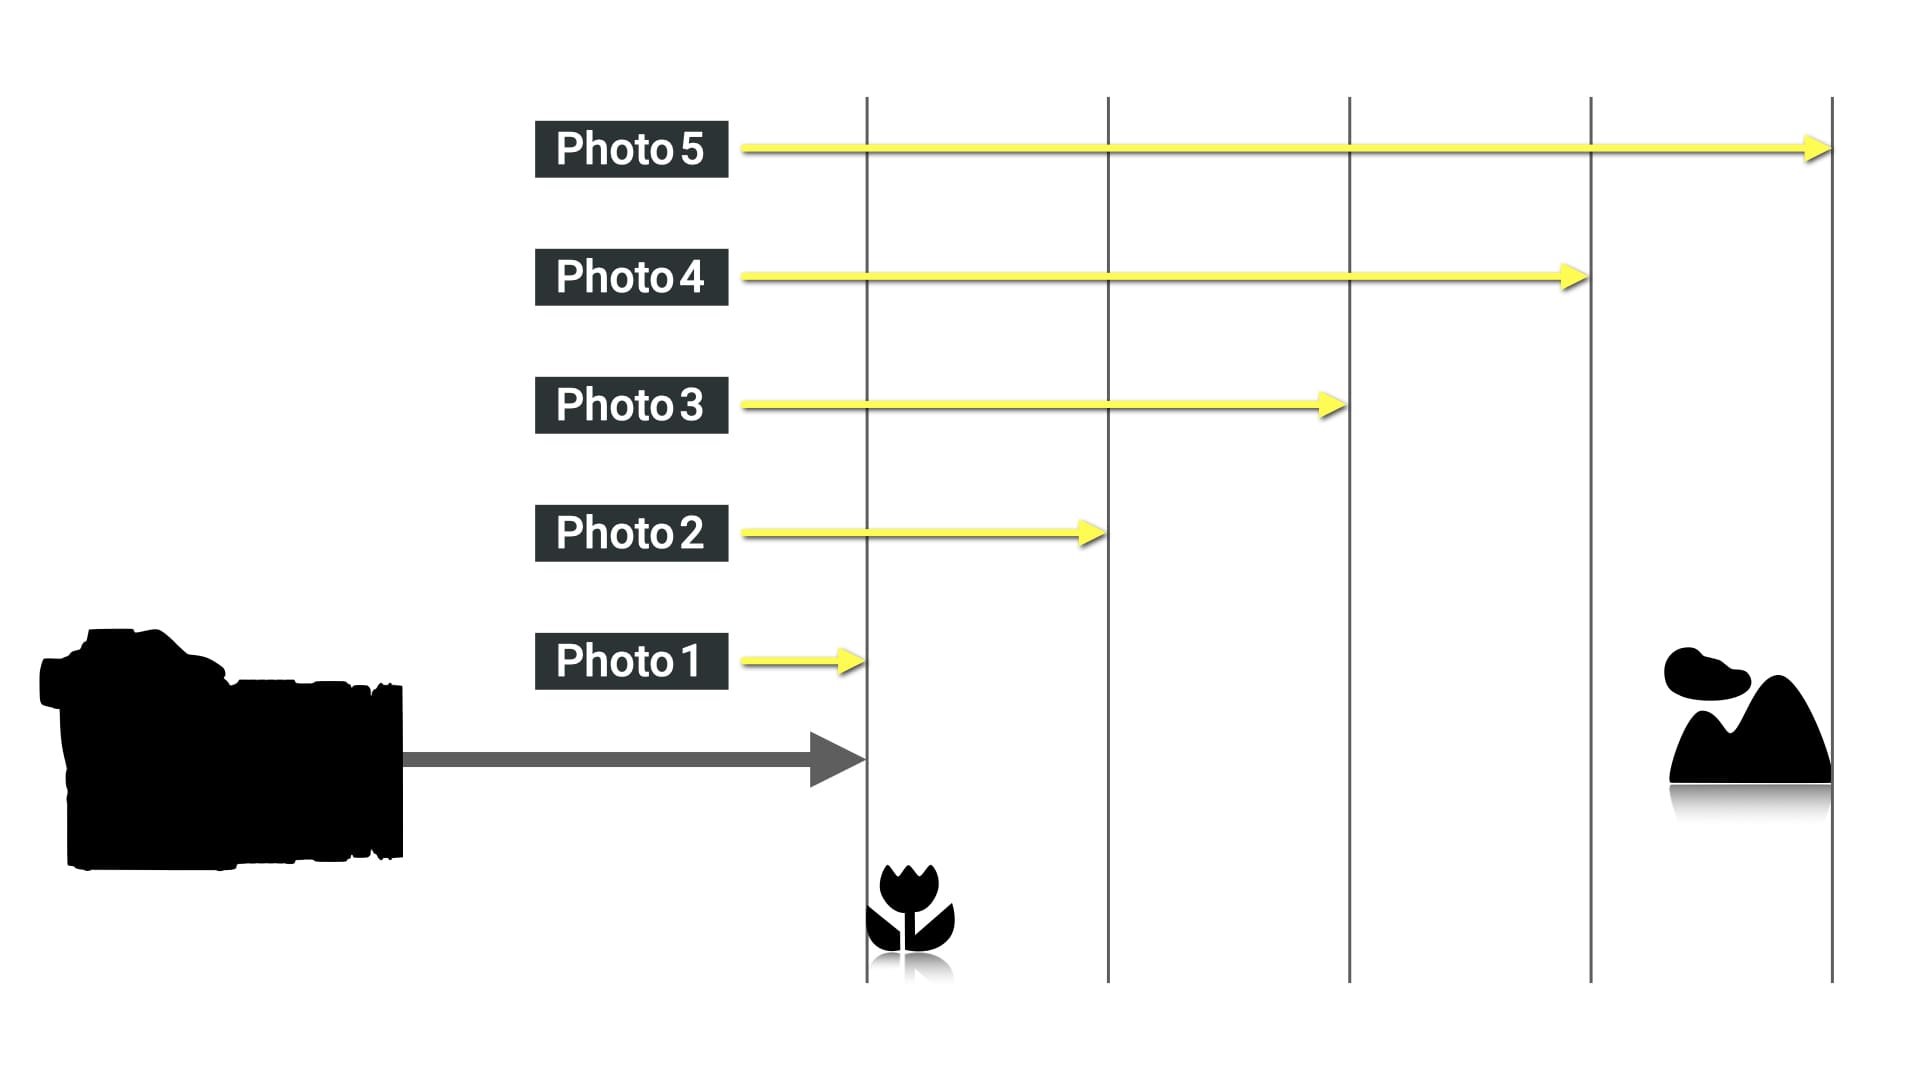
Above: Focus Bracketing process
Below: Focus bracket final composite image from 8 original shots

Customized Buttons, Dials, and Menus
The ability to reprogram a button or dial isn’t exactly new, but it’s an option that’s been expanding at a rapid pace. At first is was a single button with a few options and now it’s possible to reprogram up to a dozen buttons. Most all cameras also offer the ability to customize the quick menu as well as create a My Menu with only the items you desire.
This customization has made the cameras both more complicated, and easier to use. For those that haven’t learned their camera’s system, the overwhelming number of options can seem quite confusing. For those that have taken the time to learn their camera, they’ve simplified the operation down to just the options that are important to them. A properly customized camera is like a custom built well organized home where everything is exactly where you want it.
I also appreciate the ability to change what may seem to be an innocuous rotation of a dial. For some strange reason many cameras come programed with exposure dials that work in reverse synchronization with the light meter. You know when you are a bit overexposed and the light meter indicator is to the right of where it should be. To correct the exposure you adjust one of your exposure controls by turning it to the left, only to make the problem worse. Engineers from different companies have come to their own conclusions as to the most logical direction for the turn of the dial. It’s not unlike scrolling up and down on the computer; is your scroll ‘moving’ the paper or the window in which you see the paper. Rather than argue which is correct, it’s good that you can choose which ever method you prefer.
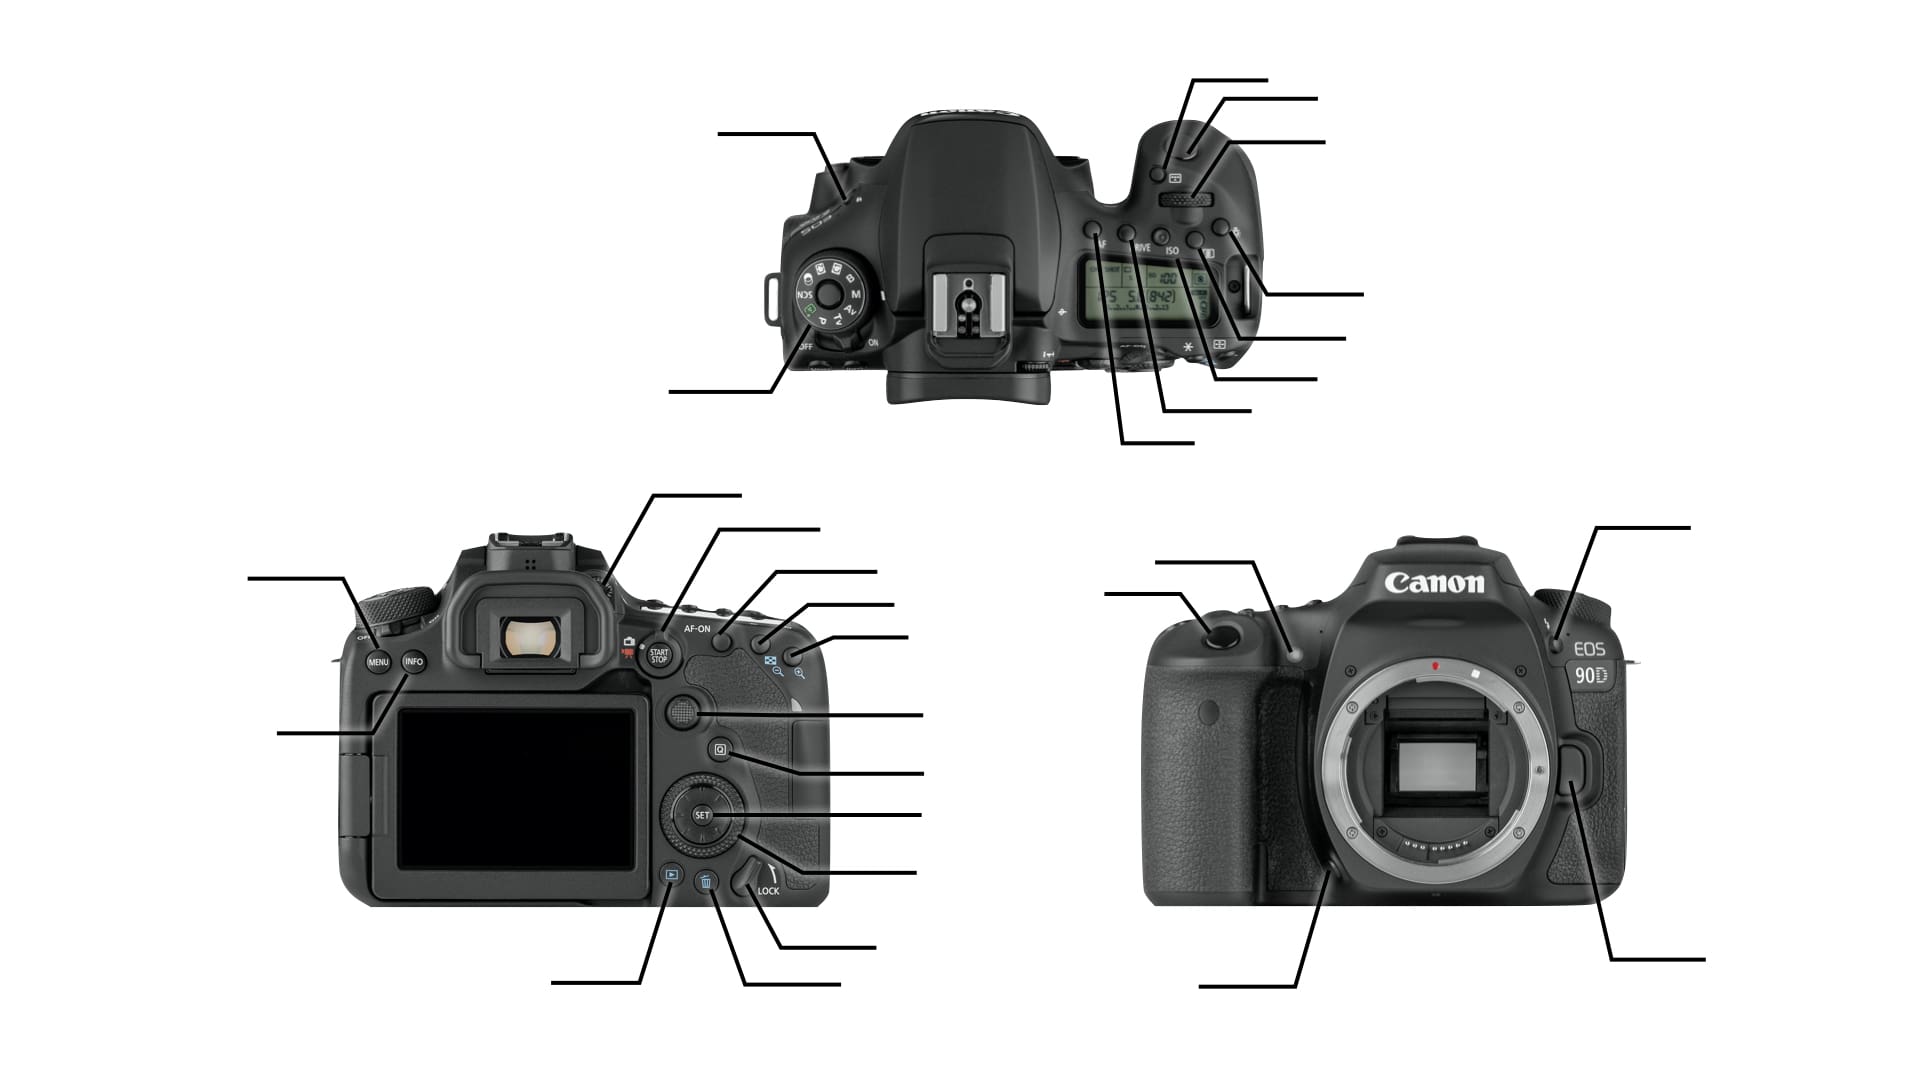
Learn about your camera’s customizable buttons, dials and menus
Become an Expert in your Camera
The number of features in a typical modern camera is excessive, in some cases numbering more than 500. They are all there for a reason. Somebody will be able to make use of it to make their photography life a little bit better. I estimate I only routinely use about 15% of my cameras features and that I take advantage of about 50% of my cameras customization ability.
The key is not to worry about all the features that you don’t use or need. Select the features that you value and make them easy to find (Quick menu & My menu). Customize the controls so that you think less about what you are doing with the camera and more about your subject, light and composition. Explore the depths of all your camera’s menus because life’s better when you’re not lost.
Become an expert in your camera with my in-depth camera classes for Canon, Fujifilm, Leica, Nikon, OM System/Olympus, Panasonic and Sony.
Become part of John’s inner circle
Sign up for the newsletter here – it’s free.
Want to become a better photographer?
Check out John’s selection of photography and camera classes here.