Modern cameras have hundreds of settings, with multiple configurations, resulting in thousands of setup variations. How you set up your camera is very much up to you. However, there are many common setup options that a majority of us could benefit from; customizing My Menu is one of the most important.
While creating my Complete Camera Guides, I get to know a wide range of camera features pretty well. Oh how I wish there was a game show like Jeopardy, that specialized in camera menu trivia. I don’t know of anyone that spends as much time as I do trolling through the menus in search of understanding what every last item does, and who it’s for.
Menu Complexity
There have been many complaints about the complexity in the menu systems of one particular manufacturer or the other. I can easily tell you, they all have their own issues. Some days I wonder if anyone is in charge of it back at the home offices, because it certainly looks like it’s an afterthought in many cases.
Organization, naming protocols, conflicts, and nesting are but a few of the categories of where the problems lay. Add in abbreviations and vague titles and it’s no wonder most photographers avoid the menu at all costs.
By far the best invention in this corner of the camera world, and one that’s thankfully been adopted by most all the manufacturers, is My Menu. A separate customizable menu dedicated to just the items you want to see.
My first camera with a My Menu was the Canon 40D (2007), which I believe was one of the first on the market to feature it. Up until then, a separate menu wasn’t really necessary. One of the first widely popular DSLRs was the Canon D30 (2000), not to be confused with the 30D (2006), which had a grand total of 31 items in one, sort of long, scrolling menu. By contrast, the current Canon R3 features 433 menu items, in 9 tabs, on no less than 50 separate pages.
Canon designers were right, put more than a few dozen items on a list, and people are going to get lost. Give someone credit for coming up with the idea, and actually getting it implemented into a working camera – kudos to Canon, or whoever came up with the idea. Fortunately My Menu has now spread to most manufacturers and is available in most modern cameras today.
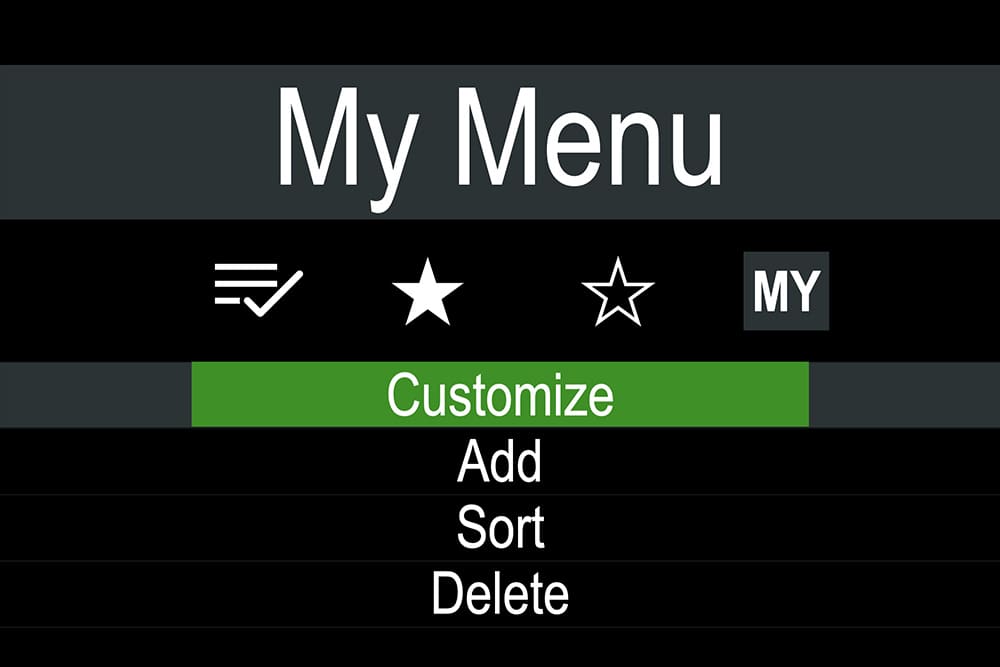
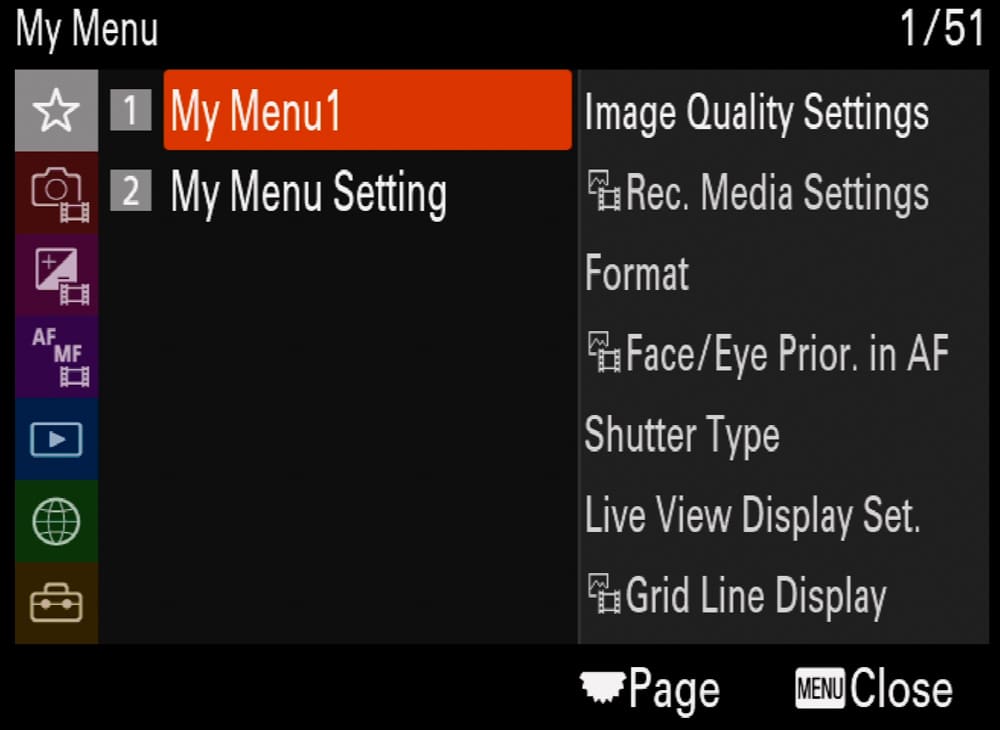
Nikon’s version of My Menu (before customization)
Customizing your Camera
Modern cameras are highly customizable and there is a common sense hierarchy in how you should setup your camera.
Step 1 – Buttons & Dials
For the most frequently used controls – like those dealing with exposure, focus, and drive settings – you should have those features available in physical buttons and dials. Most cameras already have many of those controls in place and they can be augmented with customizable function buttons that can be set to your preferred control.
Step 2 – Shortcut menu
The second repository of key settings would be with the designated shortcut menu. Usually accessible with a designated button other than the Menu button, these have names like Quick Menu, Set Menu, iMenu and Super Control Panel. These single page shortcut menus are available, in most cases, to be customized with a limited set of controls. Options are usually limited to basic exposure, focus, drive controls, along with a few other items like file storage and card management.
Step 3 – My Menu
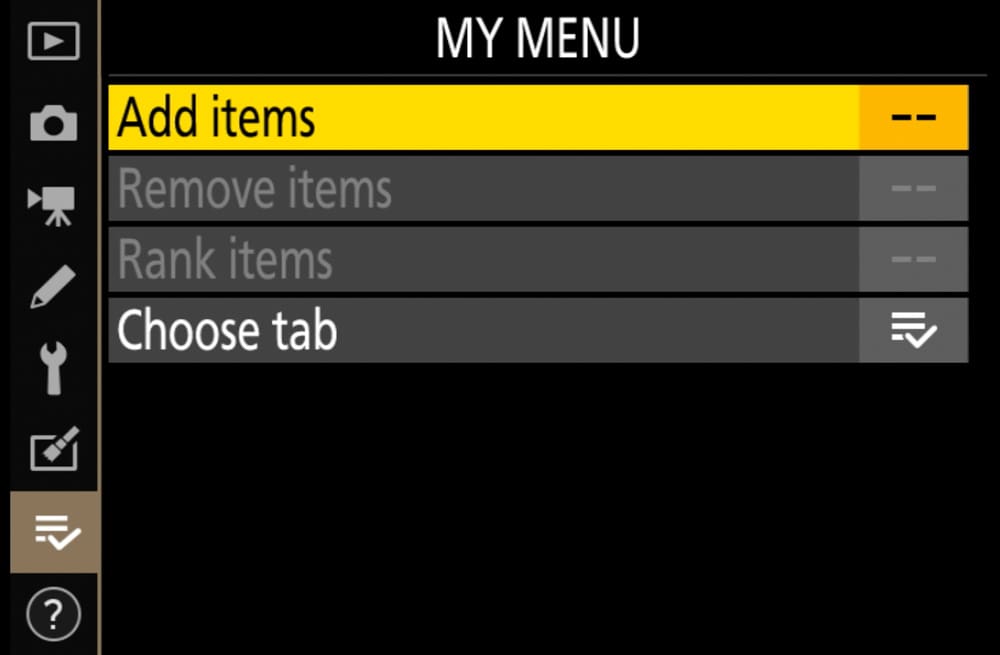
The third step in customization is My Menu. This is a separate, fully customizable section of the menu that you get to populate with whatever items in the menu that you would like to be there. The concept behind this is that if you only change a few items in your menu system on a regular basis, it would be much quicker to find them if they were all kept in one place. All items in My Menu are also in their original location, you’ve just created a shortcut, or alias, to get to your favorite items on what is essentially a favorites page.
Clearly, you should add any frequently used menu items into your My Menu. The benefit of My Menu over the previously mentioned shortcut menu is there is a wider variety of controls and features that can be included in it. For the most part, any item from the menu can be placed in My Menu; and in any order. In some cases you can even create sub-groups or pages of similar items.
Should you be at a loss for what might be a useful item to put in My Menu I thought I would put together a list of my recommended items. (Warning: manufacturers use their own terminology to describe features and the wording I use is mostly generic and may be different than with your camera.)
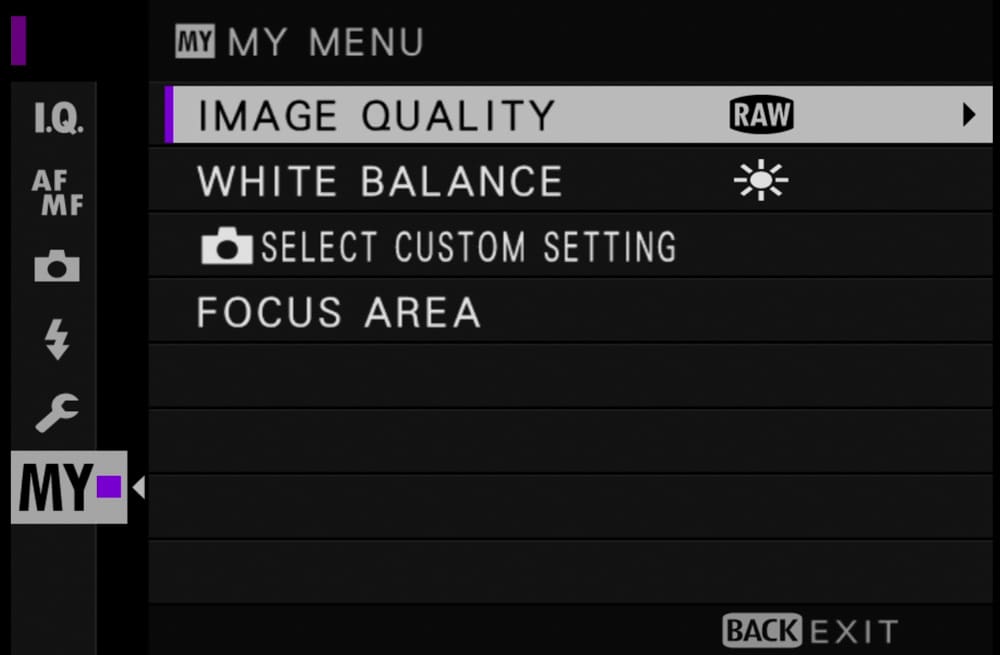
Fujifilm’s version of my menu (customized with some recommended settings)
7 Practical items for My Menu
1. File type
I’m pretty sure most of you all know the differences between RAW and JPEG and how important it is to have the camera recording the right file type. As much as I’m a RAW proponent, I sometimes use JPEG, and if you want to be 100% sure you are on the right file type, it’s good to see it right at the top of My Menu.
2. Memory card recording options
The majority of cameras feature multiple card slots. There are multiple variations of where different files are recorded between RAW, JPEG, and Movies, and if backups are being recorded or if a second card is being used just for overflow. Making sure this is right, falls slightly below File Type, so having it sit physically below it in your My Menu makes good sense.
3. Format memory card
Since we’re on the topic of the memory card, this might be a good spot to put the Format option on the list. You should be formatting your cards on the regular basis to keep them in good working order. Don’t do it right now, unless you are happy to permanently delete all your images. Once you’re done storing and backing up your images, format your memory card(s) before heading out on your next adventure; it’s a smart step to take.
4. Battery level
Not all cameras have this, or need it.But since our cameras won’t click if we don’t have the gas, the responsibility is upon us to make sure the tank is full enough for what we need it to do.
Sony’s version of my menu (customized with some recommended settings)
5. Subject/Face/Eye tracking
The modern camera’s ability to identify and track a moving target is phenomenal in my opinion. It’s increased my ‘keeper’ rate by a high percentage and made action photography far more available to the masses. However, having the camera decide what to focus on just doesn’t work so well for static situations. I’m sure there are those that always, or never, use this feature, but for those that shoot a variety of subjects, this is a great way you can quickly turn it on and off.
6. Electronic shutter
The rapid advancement of sensors and their ability to capture an exposure without the need for a physical shutter is changing how we shoot photos. The electronic shutter enables: silent capture, extra fast shutter speeds, extra fast motor drive rates; and eliminates vibration as well as reduces wear and tear. Said another way, this feature may be useful to the photojournalist, travel photographer, wedding photographer, portrait photographer, sports photographer, macro photographer and time-lapse shooter. (I think we have just about everybody covered with that grouping.) Yes, there are possible distortion issues (depending on the camera), and other issues with this feature, which is why you will only want to use it selectively.
7. Viewfinder/Monitor display options
Having a clear, unobstructed view of your subject is a great thing, and downright necessary most of the time. However there are a variety of display options that can be very helpful, some of the time. This entry is actually a sub-list of practical viewfinder aids that I think will help with exposure, composition, or focusing.
- Display simulation – Turned on with a mirrorless camera, this will mimic the brightness of your final image; great to have on most of the time, terrible to use with flash.
- Grid level – Great as a composition aid and making sure straight lines are indeed straight.
- Horizon level – You don’t want water photos spilling off the edge of image do you?
- Focus magnifier – When you want to be 100% sure your image is in focus, this is the tool to use.
In Summary
What belongs in your My Menu is up to you. Populate your menu with the items you access and change on a regular basis. Some cameras allow you to group items or put them on different pages so you can separate different categories of features. Some good ideas for groupings: exposure, AF (auto focus), drive & shutter, portrait, action, landscape, time-lapse, video, file & card.
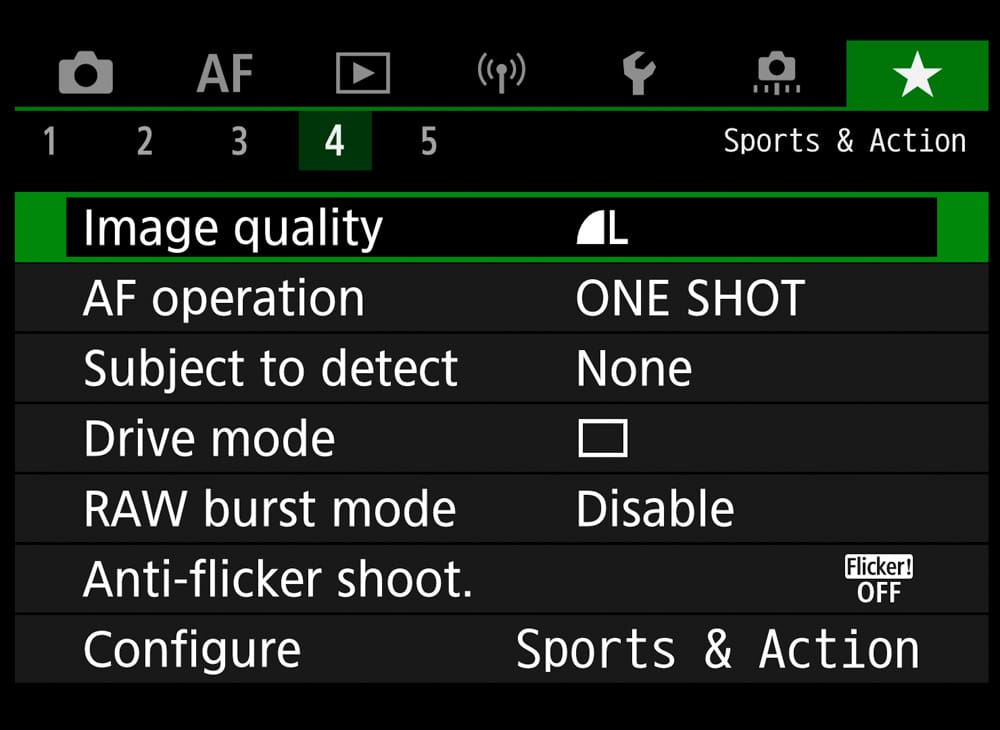
My Menu example – customized for sports & action
Maybe it’s time to take a deeper look into your menu and note all the items you don’t want to get lost looking for when the next photo is begging to be taken. Get your My Menu all organized in the peace and quiet of your home, then head out for a day of shooting. You’re sure to realize a few mistakes you’ve made in setting up your My Menu, but not to worry, none of this is permanent. You can reorganize again and again to your heart’s content. It’s likely that your My Menu will evolve to reflect your changing shooting priorities and way of working.
Now what I’d like to know is: what’s in your My Menu? Let me know in the comments below.
Become part of John’s inner circle
Sign up for the newsletter here – it’s free.
Want to become a better photographer?
Check out John’s selection of photography and camera classes here.